Pages

Friday, March 30, 2012

Omelette Puff In Sweet Sour Sauce (Fuyunghai)

This is my second attempt cooking this dish, and I got the texture I wanted - puffy omelette
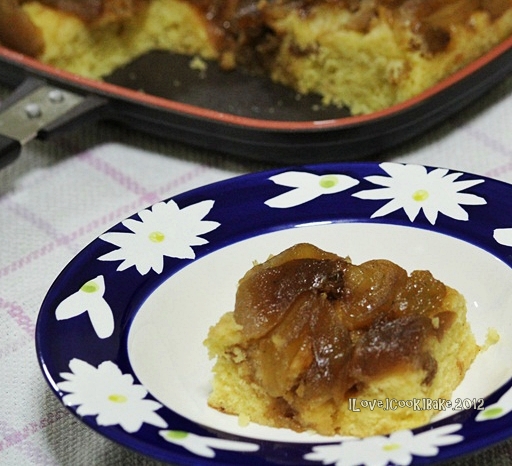
The first one I couldn't get puffy texture, instead it was flat and soggy
I guess I have mixed too much meat and vegetables, not enough eggs and I should have used more oil during frying, it's supposed to be deep fried, not pan fried


Recipe is from Indonesian recipe website Resep Masakan Online

For the omelette:

What you need:

8 eggs, lightly beaten
2 cloves of garlic, minced
1/2 onion, finely chopped
50g minced prawns
50g crab meat
100g minced chicken
30g cabbage, julliened
30g sliced carrots, julliened
1 1/2 tsp salt
pepper
2 tbsp plain flour
1 tbsp sago flour
2 stalks spring onion, finely chopped
enough cooking oil
  1. Sautee garlic and onion with a little cooking oil til fragrant, set aside
  2. Except eggs and flour, mix all ingredients including sauteed garlic and onion til well incorporated
  3. Add in flour, mix well
  4. Preheat enough oil on chinese wok for deep frying
  5. Just before frying, add in the eggs, mix well
  6. Divide batter into 4, and deep fry the omelette til golden brown both sides
For the sauce:

What you need:

2 cloves of garlic, minced
1/2 onion, julienned
1 large red chillies, discard the seeds, chopped
5 tbsp tomato ketchup
2 tbsp worchestershire sauce
sat, pepper, sugar
750ml chicken stock
1 tsp white vinegar
enough green peas
enough sago flour mixed with water as thickener
a little oil
  1. Sautee garlic, nion and chilli with oil on hot frying pan til fragrant
  2. Add in tomato ketchup, worchestershire sauce, salt, pepper, sugar, mix well
  3. Add in chicken stock, bring to boil
  4. Add in peas and vinegar, adjust the taste and cook for 1 minute
  5. Add in thickener to the desired consistency
  6. Bring to boil then off heat
Is this look appetizing to you? :P

Thursday, March 29, 2012

Creamy Mango Pudding

Recipe is from Ricke's site with slight modification
Since I have been seeing many Thai honey mangoes lately, it's just the right time


I did this recipe quite sometime back but I found it too hard and too creamy, so this time I did some adjustment to suit my liking

What you need:

1 pack (12g) white agar agar powder
500g (3 large mangoes / 4small) mangoes, diced
1L fresh milk
200ml water
150g sugar
  1. Mix together sugar and agar agar powder, set aside
  2. Prepare the mould, splash with water and do not wipe dry -> this way will help the pudding to glide out easier
  3. Mix cut mangoes with 200ml milk, blend til smooth
  4. Add in the remaining milk and also water, blend til well mixed and smooth
  5. Pour into a pot, add in the agar agar powder mixture
  6. Bring to boil over low heat, stir continuously
  7. Once boiled, off heat
  8. Pour into the mould, let cool and keep in the fridge
Note:
I personally will prefer to add mango chunks into the pudding
The next time I make, I'll add mango chunks into the mould before pouring the pudding

Overall, this is a nice and refreshing pudding with smooth velvety texture :)

You see, Dorami was wondering, how come there's something looks so yummy similar to her color LOL


I'm linking this with:

Wednesday, March 28, 2012

Grilled Stuffed Rice In Banana Leaves (Nasi Bakar) (Happy Call)

Very well loved by Indonesians
This authentic Indonesian dish is basically rice cooked in coconut milk wrapped in banana leaves with some fillings at the centre, and then grilled. Many different variations in terms of the filling
Mine used shredded chicken and silver fish, both cooked separately before being put in the rice. And I used my Happy Call pan to do the grilling :)
The fragrant from banana leaves makes the already yummy rice tasted even better, adding with the yummy filling, this dish doesn't need anything else, perhaps some spicy chilli paste :)


The picture below is the two fillings...


Recipe is from my mum...

What you need:

For the rice:
2 cups rice
3 bay leaves, rinsed
a stalk of lemongrass
coconut milk (I used 100ml Kara coconut milk)
salt, water

I cooked the rice in my rice cooker, mix all ingredients in it til cooked
(adjust the quantity of water according to your preference, not too soft, the best is the consistency of fried rice)

For the shredded chicken:
400g chicken breasts
5 cloves of garlic. minced
3 shallots, sliced thinly
1 thumb size  kaemferia galanga (in Indonesian: kencur)
2 bay leaves
75ml coconut milk (Kara)
1/2 tsp ground coriander
salt, pepper, sugar, sweet dark soya sauce (kecap manis)
a little oil
  1. Boil a pot of water with the chicken, bring to boil, discard the residue, simmer approximately 1 hour til chicken softened, after that scoop out the chicken from the stock and let cool
  2. After cooled, shred the chicken
  3. Chop garlic, shallots and kencur and then blend til forms smooth paste
  4. Add in shredded chicken, add in a little stock (approx 3 tbsp)
  5. Add in salt, pepper, sugar, coriander and kecap manis, mix well
  6. If it's too dry, you may add a little oil and keep stirring
For the silver fish:
100g silver fish, fry til crispy
3 shallots, sliced thinly
2 large red chillies, sliced thinly
sweet dark soya sauce (kecap manis), salt, sugar, water, a little oil
  1. Sautee shallots and chillies with oil on hot frying pan, add in kecap manis, salt, sugar, water and bring to boil, let simmer in medium fire til the mixture thickened
  2. Add in fried silver fish, stir til well combined
Topping:
Mix coconut milk, water and salt in a pot, bring to boil, stir continuously til the mixture slightly thickened

To assemble: 
Cut banana leaves according to the preferred size (rectangle shape)
Spread rice on the leaf (the centre part), top it up with both fillings, top up with more rice, covering the filling
Pour 1-2 tbsp of topping and wrap the leaf
Secure each end with toothpick

Arrange the wrapped rice on Happy Call pan and grill til the leaves turned brown both sides

Pretty complicated and time consuming procedure but it's really worth the effort! :)

Tuesday, March 27, 2012

Bake Along #21 - Fresh Strawberry Cake With White Chocolate Chips

Just like the title of the book where this recipe comes from - Cake Keeper, this cake is really a keeper!
Soft and fluffy - I really mean it, it's really really soft and fluffy, my kind of cake
I couldn't stop at 1 slice each time I ate this cake, not so good for my waistline :)

One thing is it's really sweet, I have halved the sugar amount and I still find it's too sweet, especially after left overnight
I guess cos of the sweetness from white chocolate. I am a dark chocolate fans, not really into white chocolate. The next time I bake this cake again, I'll replace with dark chocolate instead :)

And I found that the white chocolate in the cake didn't melt, anybody experienced the same thing as me?


You see thefirst pic above?
I was quite upset to find out that all the pictures I took was quite blurry, that was the best after sorting out! :(
Perhaps I was quite tired that day, after I was out in the morning, I immediately baked this cake once I reached home in the late afternoon. After I finished preparing all ingredients, I paused for 1 hour to assist Abby doing her homework. By the time I finished everything including the washing (the most dreadful part!) it's already close to 9pm and I haven't had my dinner. So while I waited for the cake to cool, I had my late dinner. After that I had to clean up kitchen, tucked my kids to bed and then finally I could take a snap of the cake
Perhaps I was a little too rushed and didn't really concentrate, hence the disappointing result wew...  Anyway taking pictures at night can never be as good as during daytime when the sunlight can be such a great help, but often I don't have choice...
Ok, I shall stop complaining, since the second pic was not that bad :)

Here's the recipe with the adjustment I made...
(original recipe is from "Cake Keeper Cakes" by Lauren Chattman)

What you need:

1 egg
1 egg yolk
1/2 cup sour cream
1/2 tsp grated lemon zest
2 tsp vanilla extract
1 1/2 cup plain flour
1 1/2 tsp baking powder
3/4 tsp baking soda
1/4 tsp salt
6 tbsp unsalted butter, softened
1/2 cup sugar
8 ounces strawberries, sliced into 4
1 cup white chocolate chunks
  1. Heat oven to 175degC. Grease 9"square pan, dust with flour and knock out the excess
  2. Combine egg, egg yolk, sour cream, lemon zest, vanilla in large bowl and beat lightly with balloon whisk
  3. Combine 1 1/4 cup flour, baking powder, baking soda, salt in medium bowl, sift together
  4. Combine butter and sugar in mixing bowl, cream with electric mixer on medium high til fluffy, around 3minutes
  5. Reduce to medium low speed, pour in egg mixture into the bowl in a slow stream, mix well
  6. Turn mixer to low speed and add flour mixture, 1/2 cup each time, After the last addition, mix for 30secs on medium speed
  7. Combine strawberries and remaining 1/4cup flour in medium bowl and toss to coat
  8. Fold the flour covered berries along with the chocolate chips into the batter with spatula
  9. Scrape batter into pan and smooth top with spatula
  10. Bake for 25minutes til golden brown, when skewer comes out clean
  11. Let the cake cool in the pan for 5minutes, invert on wire rack and then turn it right side up, cool completely
This cake is for the exciting event of Bake Along #21, please visit the hosts' wonderful blogs too : Joyce, Lena and Zoe.
Thanks for the idea of baking this fabulous cake, it's very well received by my family

Monday, March 26, 2012

Spinach Macaroni Cheese (Donna Hay)

I always know Donna Hay but never try even one of her recipe
This is my second recipe of hers that I made and the more I browsed her site, the more recipes I want to try! :) I have to thank Zoe whom hosting Cook Like A Star with Donna Hay as the featured chef for this month
With my to do list from Donna Hay's site, adding with those made by other participating bloggers, I'm sure I'll still cook or bake using her recipe even after March is over :)

This time I chose baked spinach macaroni cheese, a change for the usual pasta recipes I cooked for my family


I modified the recipe to suit my family preferencem the original recipe is HERE

What you need:
400g macaroni
1/2 onion, julienned
1 chicken breast, diced
3 cups (750ml) milk
1 ½ cup (180g) grated cheddar cheese
1 ½ tablespoon Dijon mustard
sea salt and black pepper
150g baby spinach leaves
1 cup (120g) mixture of grated cheddar and parmesan cheese, to sprinkle
a little cooking oil
  1. Preheat oven to 200ºC
  2. Cook the macaroni in a saucepan of boiling, salted water for 10 minutes approximately or until al dente. Drain, set aside
  3. Heat frying pan, pour a little oil and add in onion, cook til fragrant, add in chicken and cook til color changed
  4. Add the macaroni, milk, cheddar, mustard, salt, pepper and lastly spinach and mix to combine over medium fire
  5. Spoon into ovenproof dish, top with extra cheddar & parmesan cheese and bake for 10–15 minutes or until the cheese is melted and golden brown
I'm linking this to Cook Like A Star blog hop event featuring Donna Hay as the celebrity chef for the month of March


Sunday, March 25, 2012

Chocolate Pudding Cake

This time it's not me who baked this cake, but my sis :)
Lately she's inspired to bake quite a number of cakes by Martha Stewart
It's apparently too irresistable to ignore those yummy pictures displayed in her IPad apps
This was actually not the first, but second bake she did, the first one was brownies which I simply forgot to take a snap of. By the time I remembered, it's gone LOL

This chocolate pudding cake looked just like a piece of brownie isn't it?
But once you sink your teeth on it, you'll know that it's not
It's so very rich, moist, fudgy, deep dark intense kind of chocolate cake, thanks to the fudgy batter mixed together with the cake batter

Very easy to prepare, no mixer required -> her favorite (mine too, actually LOL)

It's not easy actually to get a nicely cut piece like the two pieces in the pic below, cos this cake is supposed to scoop to eat, ideally with vanilla ice cream, but I was too freaked out with the calories that I skipped the ice cream :)


Somehow I couldn't find the recipe in Martha's website, it's only available in her IPad app
Here it is...

What you need:

For the cake:
1 cup all purpose flour
1/3 cup cocoa powder
1/2 tsp baking powder
3/4 tsp salt
---> sift together the 4 dry ingredients above
2 large eggs (or 3 small), lightly beaten
1 cup sugar
4 tbsp unsalted butter, melt and cool
3/4 cup fresh milk
2 tsp vanilla extract

For the fudge:
1 cup packed brown sugar
1/3 cocoa powder
1 1/2 cup boiling water

20cm round baking dish, greased lightly

To prepare the cake batter:
  1. Whisk the beaten eggs and sugar til it dissolved, add in melted butter, whisk to combine
  2. Add in milk and vanilla, stir til just combined
  3. Fold in dry ingredients til well combined
  4. Pour to greased dish
To prepare the fudge batter:
  1. Whisk the 3 ingredients til well combined and pour on top of the cake batter, only pouring on the centre part
Last step:
Bake on preheated oven of 175degC for 30-35minutes, when skewer comes out with crumbs

Best to serve warm

I'm linking this with:
* Sweet Tooth Friday
* Sweets For A Saturday #62
* Sweet Indulgences Sunday #48

Saturday, March 24, 2012

Blueberry Orange Muffins

I always love any kind of cakes with fruits
So, when I managed to get fresh blueberries, I was thinking of pancakes and muffins, and the final choice was muffins :)

Saw this recipe in Ann's site, literally made me drooling, so this was my choice :)
I made 1 and 1/2 recipe since I wanted to share some with my neighbour and I made half with chocolate chips for my kids since they do not really fancy blueberries
Such a soft and moist muffins, yum!


This is the blueberry muffin


And this is the  chocolate chips one


Below is one recipe...

What you need:

250g plain flour
3 tsp baking powder
pinch of salt
120g castor sugar
2 large eggs (room temperature)
4 tbsp fresh orange juice
2 tsp orange zest
180ml oil
1 tsp vanilla extract
160g plain yoghurt
125g frozen blueberries (1punnet)
  1. Sieve flour, salt, sugar, baking powder and mix well. Set aside
  2. Whisk eggs together, add in yoghurt, vanilla, orange juice, orange zest and oil til combined. NOT to overbeat this mixture
  3. Batter should be thick (spoonable, not pourable)
  4. Scoop batter to muffin cups til 80% full
  5. Bake at preheated oven of 190degC for 20-25 minutes
Easy recipe with wondeful result :)

I'm linking this with:
* Sweet Tooth Friday
* Sweets For A Saturday #62
* Sweet Indulgences Sunday #48

Thursday, March 22, 2012

Mashed Tofu Omelette With Dark Sweet Sauce

I cooked this long time ago, posted before HERE
This time, I didn't prepare the eggs fried hardboiled, but instead I mix 3 beaten eggs and mashed from 1 piece of taukwa (firm tofu), added with chopped spring onion and seasoned with salt and pepper
Still accompanied by deep fried tofu puff (it's a must) and eaten with the dark sweet sauce, also I sprinkled with chopped bird's eye chillies
Also never forget pickled white raddish
Eat with hot fluffy rice, and I feel so close to my hometown LOL


The one on the right is the mashed tofu omelette and tofu puff on the left
Now, I shall eat this for my lunch...tata!

Tuesday, March 20, 2012

My Very First Macarons

It's been so long since I wanted to give a try on macarons making
Something that many dreaded of, heard many unsuccesful attempts, made me thinking twice, thrice and been procrastinating since, beating my curiousity

This month Aspiring Baker's event coincidentally is macarons
It's like a wake up call for me to at least give it a shot, and not to fear failure

I found Tartlette via Bakerella and Peng's site, did some readings on how to and the tips, too, and here it is, my first macarons, and I chose chocolate this time, cos I know, whether it's a success or not, something chocolate will end in Abby's little tummy :)


Have I succeeded? I don't think so. Have I failed? I can't say that
I was glad I saw feet coming out, but it doesn't look nice enough to me. The feet should look nicer

I managed to pipe 24 circles on 2 separate pans, 12 each. 1 pan were all cracked on top, while the other pan were all smooth. 
You see in the picture above, the first picture, second macaron from the top, you see the crack at the bottom part? Yes, that's one of the cracked shell :(

Those cracked were put at the bottom rack while baked
Why? I shall find out. One thing I can think of is the adjusting of the oven temperature. I have to play with it a little the next time I give my second try, I guess. Anybody can help me?

The part which many dreaded of, the beating of the egg whites, not really an issue to me, honestly. What I found not so easy was the piping of the runny batter and to obtain uniform round shape. I think mine was a little too big wew...

There's something I'm also not too sure.. Some said to age the egg whites in loosely covered container in room temperature, some said in the fridge. Anybody can advise me on this? Does it make any difference actually?

For this batch, I was so sure that it would turn disastrous that I didn't even bother to prepare the buttercream filling, so in the end I only used nutella spread

Personally, I don't really fancy eating macarons, it's way too sweet to my liking
Abby loves them to the bits 
True enough, mostly were now in Abby's tummy LOL
I asked her to take the cracked ones first since I didn't need them for photo taking hehe...

Recipe is from Tarlette, but I used Peng's measurement

What I need:

90g icing sugar
50g ground almond
25g granulated sugar
50g egg whites
5g cocoa powder
  1. Grind almond and icing sugar until fine, sift together with cocoa powder
  2. Beat egg whites on high speed til foamy. Add granulated sugar gradually and beat til glossy and stiff peak form. Do not overbeat, it'll be too dry
  3. Fold in almond mixture in batches til well blended (fold in vigorously for the first 30seconds, and the nslow down, not more than 50 times of folding in)
  4. Transfer batter into piping bag and pipe on baking sheet lined with non stick parchment paper, let rest for 1 hour to dry the shells (it should be dry to the touch, best to put in aircon room)
  5. Bake in preheated oven of 160degC for 15-20minutes
  6. Remove from oven, cool down for 5minutes, peel cookies from paper and cool completely on wire rack
  7. Pipe a dollop of filling on one side of the macaron, top with another shell, press down slightly. Chill before serving (overnight will be best)
Now, I shall see in my next attempt, hope I will get better result :)

Monday, March 19, 2012

Creamy Scrambled Eggs With Smoked Salmon (Donna Hay)

Zoe from Bake For Happy Kids organized a very exciting blog hop event "Cook Like A Star"
and for this month, Donna Hay is the featured celebrity chef
I have bookmarked some of her delicious recipes and this is the first one I did for my breakfast yesterday
Been having sweet breakfast for quite sometime, you know... marmalade toast, nutella bread, french toast or pancake with maple syrup... Enough of all those, switched to cereal with milk, granola with yoghurt, oats with raisins... Tired of that, and I was yearning for something savoury to start my day
This is what I need :)

Such a perfect combination, I sunk my teeth at my first bite and I didn't stop til my plate was clean LOL
Really delicious and such a short time to prepare :)


I bought the sourdough from Cedele, one of my favorite eateries, and black pepper smoked salmon from Cold Storage supermarket, so the only thing to prepare was only the scrambled eggs, but I personally do not fancy too creamy types so I replaced half of the cream to fresh milk

Recipe is from Donna Hay site which I modified slightly

What you need:

4 eggs,
few pinches of salt
60ml single cream
70ml fresh milk
20g butter
100g black pepper smoked salmon
toasted sourdough
  1. Place the eggs, salt, cream and milk in a bowl and whisk well til well combined
  2. Melt in butter on frying pan over medium heat, add in egg mixture and stir for 1-2minute or til just set
  3. Arrange the eggs on toasted sourdough and put salmon on top
Note:
  • I didn't sprinkle black pepper since I used black pepper smoked salmon
  • Grated parmesan cheese can be added on top for extra flavour
I'm linking this to Cook Like A Star blog hop event featuring Donna Hay as the celebrity chef for the month of March


Friday, March 16, 2012

Apple Upside Down Cake (Happy Call)

My second experience with Happy Call double sided pan...this time is baking cake yum... :)
As an apple cinnamon lover, I was literally drooling when I saw this recipe, hence I chose this, with slight modification :)


The texture is soft, more like steamed cake.. The caramelized apple raisins on top remained juicy, really yummy :)


This how it looked like just after cooked... I guess I have used too much apples... no complaint though LOL


What you need:

For the cake:
100g cake flour
80g plain flour
3 tsp baking powder
4 large eggs (60g each)
90g caster sugar
1/2 tsp vanilla extract
grated rind of 1 lemon
60ml melted unsalted butter
60ml canola oil

For the caramel apples:
75g unsalted butter
150g packed brown sugar
75ml water
5 medium granny smith green apples, peeled, cored and cut
1 1/2 tbsp lemon juice
1 tsp cinnamon powder
150g golden raisins, coat with flour

To make caramel apples:
  1. Cut apples 0.5cm thick, lightly marinate with lemon juice and cinnamon powder, set aside
  2. Simmer butter and brown sugar over low heat in HCP until sugar dissolved and mixture begins to bubble. Stir in marinated apples, water and continue to simmer over low heat for 5minutes or until apples slightly soft (close but do not lock)
  3. When done, off hear, arrange apples and half of golden raisins as close as possible without too much gap in between. Set aside and prepare the cake batter
To make cake batter:
  1. Sieve together cake flour, plain flour and baking powder, set aside
  2. Whisk eggs, sugar, vanilla til well mixed (around 1minute) til slightly pale, whisk in melted butter, oil, and mixture of flour & baking powder
  3. Continue  to stir til flour incorporated into the batter (batter will be slightly like thick cream mixture), add in the remaining golden raisins
  4. Pour mixture over the prepared caramel apples, smooth the top and bake (lock the pan) over very low heat around 30minutes (usually steam comes out when cake is ready) or until skewer inserted and comes out clean (check after 20minutes of baking)
  5. Carefully flip the pan over and bake the top of the cake for another 5 minutes to brown the top before removing it from stove
Note:

My HCP is jumbo size and the original recipe used deeper pan which is one size smaller than jumbo. At first I wanted to increase the cake batter recipe to 1 1/2 but I changed my mind and stick to 1 recipe. but I added the caramelized apples as stated in the above recipe. I found it perfect, the cake was short but the ratio with the apple topping was just nice to my liking. I'll stick to this measurement the next time I bake this cake again :)

Another point to take note... To me, this cake tastes better the next day, the cake is more moist and the topping is more juicy

It's a perfect companion with a cuppa! :)

I'm posting this for:
*Sweet Tooth Friday
*Sweets For A Saturday #61
*Sweet Indulgences Sunday #47

Monday, March 12, 2012

Pan Fried Tilapia (Happy Call) & Stir Fry Mixed Vegetables

I have just purchased ochre jumbo Happy Call double sided pan, after much consideration for the past few weeks and seeing the craze going on among food bloggers

For my first experience, I chose fish since no doubt I love fish, but every encounter with fish on normal frying pan has never been pleasant at all
The smoke, the smell, the splattered oil, the super oily fried fish, the tedious stove cleaning...

I was very satisfied with the whole process and the result as well, really worth buying! :)


The fish was cut into two, marinated and fried, and the frying process has turned to a pleasant experience this time :)
Too bad one of the fish lost its precious tail LOL


I've done this recipe before, you may view it HERE

And this is the companion, stir fry mixed vegetables


What you need:

2 cloves of garlic, crushed
carrot, sliced
cabbage, cut
salt, pepper, light soya sauce, a little sugar, water, a little cooking oil

Heat oil on frying pan, sautee garlic til fragrant, add in carrot, followed by water, stir well
Add in salt, pepper, light soya sauce, sugar, lastly, cabbage
Simmer til vegetables turned soft enough (I like vegetables with crunch)
Adjust taste, off heat

Simple, yummy and nutritious meal, isn't it? :)

Friday, March 9, 2012

My First Donuts

Donuts have always been one of my weakness
Tried a few times but could never get the perfect texture and shape it's supposed to be
So it's in fact been a long time I just went to bakeries and bought them

But my kids love donuts
Even though I can't beat the bakeries varieties and perhaps taste, at least if I can make my own, I feel better knowing it's homemade
So, I decided to give it another try

This time I used Mamafami's recipe and I was so glad that it's a success
It's not prefect shape as yet, but texture wise, I was very satisfied
Now, this makes me eager to try other doughnuts recipes :)

I made some in little balls shapes too :)


The texture is soft even til the next day, it's a keeper! :)


What you need:

A
500g bread flour
100g sugar
11g instant yeast
4 egg yolks
200ml water
B
1 tsp salt
100g butter / margarine

enough oil to deep fry the donuts
  1. Stir ingredients A, knead until lumpy, add ingredients B, continue to knead until smooth elastic
  2. Rest dough for 10 minutes
  3. Roll to about 1 cm thick and cut using a donut cutter. Arrange the donut rings on a floured tray. Let it sit for another 20 - 30 minutes (depends on the weather), then fry till golden brown, let cool
  4. Spread a little butter on each doughnut with brush and sprinkle chocolate rice and cheese, or whatever topping you like
  5. Those using icing sugar, no butter needed, you may roll them in the sugar til evenly coated
I'm posting this for

Sweet Tooth Friday


 Sweets For A Saturday #60


Button

Sunday, March 4, 2012

New York Style Cheesecake

Beware! This cheesecake is highly addictive! I am one of the victim! LOL


I always think that baking cheesecake is difficult, but I was craving for this cake that I decided to give it a try
So many recipes for this type of cheesecake, I decided on this one and bingo, this is the recipe I have always wanted!


What you need:

12 cinnamon graham crackers - crushed til fine
(I couldn't find any graham crackers, yup, my luck! LOL...so I used digestive biscuits instead)
4 tbsp butter, melted

4 (8 oz) packs cream cheese
1 1/2 cup sugar
3/4 cup milk
4 eggs
1 cup sour cream
1 tbsp vanilla extract
1/4 cup plain flour

Note: all dry ingredients have to be in room temperature for smooth texture

Preheat oven to 175degC, grease 9" springform pan with crisco generously and wrap the half bottom with double alumunium foil
Combine crackers and butter, hand press into the bottom of the pan, keep in the fridge
Cream sugar and cheese til smooth, add in milk, followed by eggs one at a time, combining well after each, add in sour cream, vanilla, plain flour, beat til smooth
Pour on top of the prepared crust in the pan
Place pan in a bigger pan, fill bigger pan with boiling water to a level that's approximately 1/4 to 1/2 way up to the pan of cheesecake
Put in the oven, bake approximately 1 hour til just barely set (the middle part still jiggled)
Off oven and leave cheesecake inside with closed door for 5 hours til oven cool
Do not, I repeat, do not open the oven door to prevent cracking
Remove cheesecake and refrigerate (preferably overnight) before consuming

Now it's proven, making cheesecake is not that difficult after all :P

I'm posting this for Sweets For A SAturday #59

LinkWithin

Related Posts Plugin for WordPress, Blogger...